I have always had a fascination with image processing algorithms. Growing up, my family did not have the the most powerful computer of the current generation. When everyone was running Windows 98 on the latest Internet Explorer browser, my family was still on Windows 3.1 and Netscape Navigator 3.
It sucked. My friends were playing the latest, and greatest online games like Diablo 2, and Half-Life, while the best I had was a bunch of edutainment games, a 2D Rogue-like, and a Gameboy emulator with a few ROMs. Up until I was able to build my own computer, I had always been using underpowered machines.
I remember our first family machine, an Intel 486 DX4, 100MHz system with a VLB SVGA display adapter. It was capable of displaying 16-bit color, but only at lower resolutions. We ran our computer on a 14" CRT, displaying at 256 colors. This system served as a family internet browsing machine up until 2001, when sharing digital photos over the web was starting to become more popular.
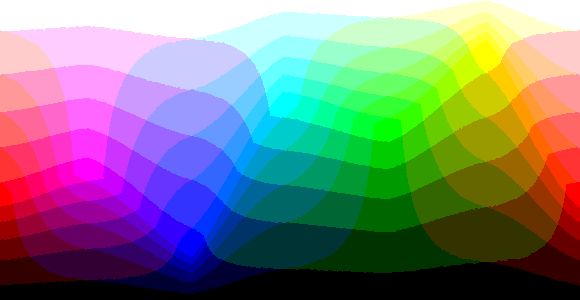
My monitor was showing colors from here:
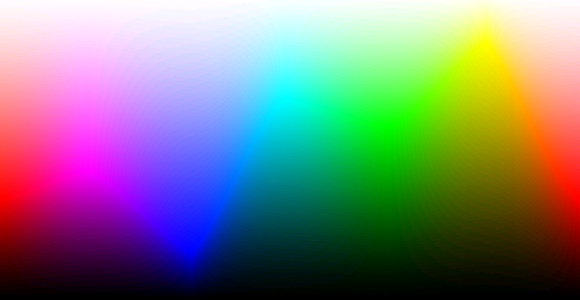
While the rest of the world, was seeing colors in full 16-bit ("High Color") glory!
One of the earliest memories I had browsing the internet around this time was that photographs looked strange. A lot of the times they looked something like this:

Even my 10 year old self knew that it was not how images were supposed to look like! Occasionally, I would come across images that looked like this on the same monitor!

How could this be? Both the monkey and the cat picture were in the same color depth!
It turns out that the latter had used dithering. Dithering is a means to introduce noise to an image with a limited color space such that the final output has neighboring pixels whose colors are not too bright, or too dark from one another. This is a form of error distribution. If an image is not adjusted, then an image with limited colors will display color banding.
Why?
Why do we want to do this? Well, the most obvious benefit in reducing the color space of an image is that it allows the data to be represented with less bits. Less color information, means less bits needed, which ultimately leads to a smaller file size.
This can result in:
- Being able to increase the spatial resolution for the image (the resolution of the image in pixels in
WxH) - Being able to increase the temporal resolution for a video due to having a smaller file size per frame. (longer running time for a movie)
Depending on the file format chosen, the limited color palette can be substituted with a color look-up table, or CLUT, thereby allowing each pixel to be a single index value to that table.
With less color data to be stored resulting in smaller file sizes, this became handy for operating systems to make use of the display memory in the best way possible. This was especially handy for days where video memory was scarce. My first graphics adapter only had 1 MB of display memory. Displaying 256 colors at 800 by 600 resolution, would have already occupied 480 KB of display memory.
Posterization
The picture of the toy monkey seen above is how typical images with very limited color space is displayed without any sort of processing applied to it. This effect is called posterization, and is essentially an approximation by the computer on which colors to display based on the displayable colors it has for utilization.
With posterization, given a pixel P = (r, g, b), the computer must find a pixel, P' = (r', g', b') where the r', g' and b' color components must be the closest values available to be returned.
Suppose that a display is a 3-bit color display, and we want to display a 24-bit image. This means that our display can output a pixel which has 1-bits each for the r, g and b components. However, our picture has 8-bits of space each for those corresponding color components.
If each pixel in the image is 8-bits, this gives us values anywhere from [0, 255] for each color component. For simplicity, let's forget the fact that 1-bit is either 0, or 1, and treat 1-bit as the display being only capable of displaying either 0, or 255.
Then in pseudo-code, we can come up with a translation which discretizes the individual image pixel components into a posterized version which the display is capable of outputting.
function posterize(p) {
	const pPrime = {r: 0, g: 0, b: 0};

	// red
	if(p.r < 128)
		pPrime.r = 0;
	else
		pPrime.r = 255;

	// green
	if(p.g < 128)
		pPrime.g = 0;
	else
		pPrime.g = 255;

	// blue
	if(p.b < 128)
		pPrime.b = 0;
	else
		pPrime.b = 255;

	return pPrime;
}
Now, pPrime is a posterized version of p. Do this for each pixel in the image, and we will produce an image only consisting of colors within our color space.
If the display is effectively 3 bits, this gives us 2^3, or 8 different colors in our palette:

Let's see this in practice. To stay within the spirit of my nostalgia, let's use a picture from Dragon Ball Z as an example.

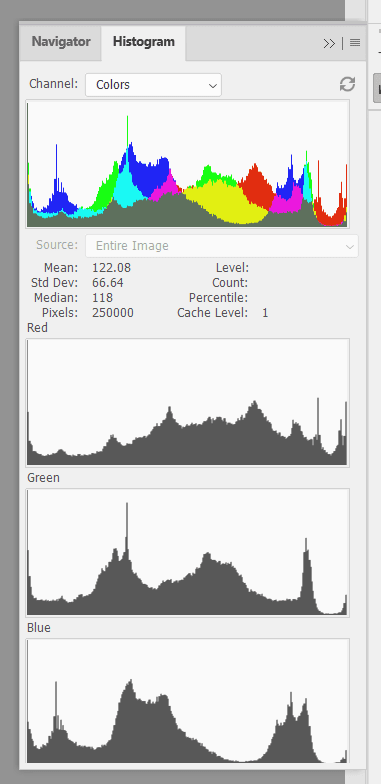
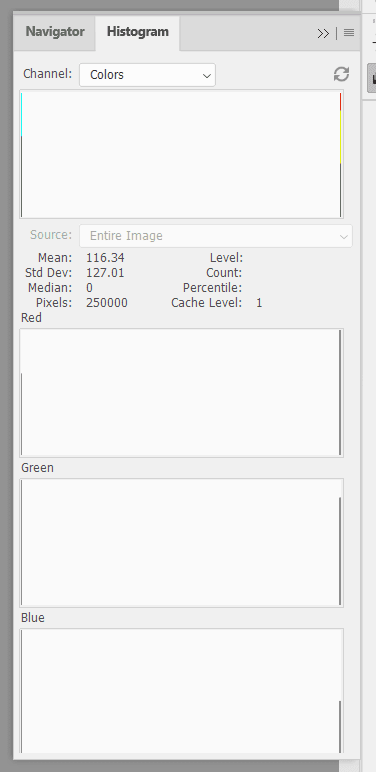
Firing up Adobe Photoshop, we can acquire the histogram of the image. This shows us the number of , , and values within each channel. We can see that there is a wide variety of colors in this 24-bit color RGB image.
Applying the algorithm above for each pixel, we get a posterized version of the image with only 8 colors:

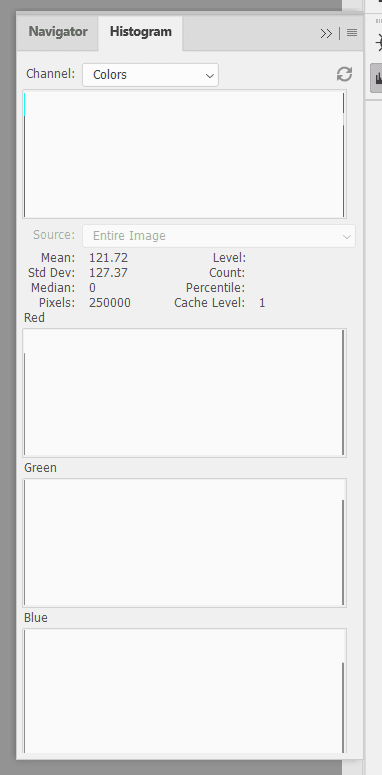
The histogram which the posterized version generates makes sense. In our algorithm, each component of our RGB pixel takes on only two values -- the extremes of 0, and 255.
The posterized image is what we expect to see from images in older graphical user interfaces in the late-80s, and 90s.
Can we do better? Of course, let's try to get the image to a similar quality as the dithered cat image shown at the beginning of this post.
Floyd-Steinberg Dithering
Although the easiest way to reduce color space is through approximation of colors which creates a posterized version of the image. This effect isn't very aesthetic if the image consists of many colors. With the previous example, the effect wasn't too bad since the original image was a screen capture from a cartoon.
What about photos?

The above photo is pretty nice, but when posterized, a lot of the quality is lost and produces an output that will cause us to lose appreciation. 😄

Enter Floyd-Steinberg Dithering. This algorithm produces nice results, and is fairly easy to implement. If I am to summarize the effect of this algorithm, I would say that we can take the same posterized image, and redistribute the colors used in that image to create a new image with an illusion that there are more colors.

The posterized and dithered images above actually have the same color palette.
How does the algorithm work? The algorithm makes use of a combination of calculating the posterized version of the pixel, and then calculating the error, and then redistributing the error across neighboring pixels -- changing their values to be brighter, or darker.
This creates artificial noise in the image, which ultimately relaxes the banding of the image.
- Given an image which pixels are in a
frame, we can compute a posterized pixelp_pfrom the original pixel,p. - Calculate the error
eof the pixels by:e = p_p - p, for every color component. - Assign
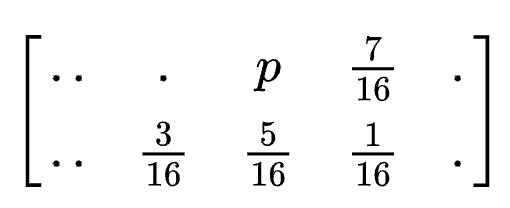
p_pto the resulting image,resultat the current pixel location at , . - Redistribute the errors by taking a specific weight (fractional) of the error value,
e, and redistribute across the neighboring pixels of the pixels found inframe. The weights to distribute is shown withpbeing the current pixel.
- The next iterations will now operate on the adjusted pixel of the original image.
Here is a pseudo code implementation.
for(let y = 0; y < height; y++) {
	for(let x = 0; x < width; x++) {
		const p = frame[y][x];
		const p_p = posterize(p);

		const error = findError(p_p, p);
		result.setPixel(c_p, x, y);

        if(x + 1 < width)
        	frame[y][x + 1] = distributeError(frame[y][x + 1], (7/16), errors);

        if(y + 1 < height)
        	frame[y + 1][x] = distributeError(frame[y + 1][x], (5/16), errors);

        if(x + 1 < width && y + 1 < height)
        	frame[y + 1][x + 1] = distributeError(frame[y + 1][x + 1], (3/16), errors);

        if(x - 1 >= 0 && y + 1 < height)
        	frame[y + 1][x - 1] = distributeError(frame[y + 1][x - 1], (1/16), errors);
	}
}findError, setPixel, and distributeError are helper methods to operate on the individual RGB pixel components.
Taking our previous example of the Dragon Ball Z image, we had the posterized image:

Applying the Floyd-Steinberg Dithering algorithm on the original image results in superior quality:

Even better, the dithered version has the exact same palette as the posterized version:
Implementation
I have implemented the above algorithms in Nodejs, using the jimp image processing library. You can find the code in this GitHub repository.
The code generates a posterized image, and a dithered image so that you can compare the results.
References
- https://en.wikipedia.org/wiki/Floyd%E2%80%93Steinberg_dithering
- https://en.wikipedia.org/wiki/Posterization