Introduction
I bought an Nvidia RTX 4090 over a year ago, for my gaming computer, but I never have really had the chance to use it. It was expensive. Like $2000 expensive! It's one of those fancy ASUS ROG cards with the pretty RGB lights. My original personal desktop was an AMD Ryzen 9 3900XT which has now been passed down to my wife for use as her file server.
The card has been unused for months now, and I feel terrible letting it just sit there. I don't want to part with it either since it is such a good GPU. Although it is big and heavy, it is incredibly fast while staying cool and quiet. The power draw is something I don't mind as it is very quiet.
The lack of use isn't implying that I don't like to game anymore. No, not at all. It's just that my personal workflow is mostly centered around Linux/macOS in the past couple of years, and no more so since leaving Microsoft. I'm mostly off Windows that I rarely get the chance to be on Windows "for fun" now.
I also live in Northern California, where space is pretty tight. So I can only have 1 desktop running under my desk. That desktop is my Xeon w9 3475x workstation running Linux!
In order to make good use of my GPU and still be able to work without having to physically switch and plug in desktops, why not run 2 GPUs in the machine where I can run a Windows 11 as a VM guest with the powerful GPU associated with it?
The perfect use case for this is if you have a Linux host computer (main machine) and a Windows VM (the one you want to pass-through a GPU to using VFIO)
Here's what is actually needed to pull this off:
- A computer with 2 GPUs.
- HDMI/DisplayPort dummy plug
- You can get one from Amazon here.
Note, that I've only been able to pass-through Nvidia and AMD GPUs. I have an Arc A770, but I haven't had a chance to mess with VFIO with it yet. Therefore for those Intel Arc users out there, you can confirm if any of these steps work for you!
Host Computer
These instructions were done on a Debian-based system, so if you're running Debian, Ubuntu, Pop!_OS or any other similar distribution of Linux, then you should be okay. I I happened to have done all this GPU passthrough with QEMU working on Pop!_OS 22.04.
QEMU Installation
Install QEMU. The best source is from Chris Titus. He has instructions on how to install QEMU with virt-manager. virt-manager is like a UI to help manage the virtual machines.
Check out the main source in how I was able to install virt-manager here: https://christitus.com/vm-setup-in-linux/. I'll summarize some of the instructions here anyway to make it easier to just use this guide as a reference in the future.
Again, this is a reminder that these commands are for a Debian-based system. You may probably have already noticed from all the apt references. Your mileage may vary on other distributions as the package managers are different. For me, I am a noob, so I use Pop!_OS specifically to get this done.
First, ensure you have the VT-d/VT-x extensions turned on for your CPU. AMD has an equivalent, AMD-V, but it is likely it's labeled the same way in the UEFI BIOS. If you have doubts, go check your UEFI BIOS manual or flip through the screens to enable it.
If you feel like VT-d/VT-x are enabled, you can run the following command to confirm in Linux:
egrep -c '(vmx|svm)' /proc/cpuinfoBasically, if what is output is something greater than 0, then you should be good to go.
Next, install QEMU and the Virtual Machine Manager (virt-manager).
sudo apt install qemu-kvm qemu-system qemu-utils python3 python3-pip libvirt-clients libvirt-daemon-system bridge-utils virtinst libvirt-daemon virt-manager -yStart the libvirtd service:
sudo systemctl status libvirtd.serviceIt should show active in the output.
● libvirtd.service - Virtualization daemon
     Loaded: loaded (/lib/systemd/system/libvirtd.service; enabled; vendor preset: >
     Active: active (running) since Sat 2024-07-06 07:30:37 PDT; 29min ago
TriggeredBy: ● libvirtd.socket
             ● libvirtd-ro.socket
             ● libvirtd-admin.socket
       Docs: man:libvirtd(8)
             https://libvirt.org
   Main PID: 889 (libvirtd)
      Tasks: 21 (limit: 32768)
     Memory: 48.4M
        CPU: 478ms
     CGroup: /system.slice/libvirtd.service
             ├─ 889 /usr/sbin/libvirtd
             ├─1122 /usr/sbin/dnsmasq --conf-file=/var/lib/libvirt/dnsmasq/default.>
             └─1123 /usr/sbin/dnsmasq --conf-file=/var/lib/libvirt/dnsmasq/default.>
Then start the default network:
sudo virsh net-start defaultsudo virsh net-autostart defaultConfirm things are working by executing this:
sudo virsh net-list --allHere's the sample output:
 Name      State    Autostart   Persistent
--------------------------------------------
default active yes yesImportant! Finally, add your current user to the necessary groups to allow access to VMs:
sudo usermod -aG libvirt $USER
sudo usermod -aG libvirt-qemu $USER
sudo usermod -aG kvm $USER
sudo usermod -aG input $USER
sudo usermod -aG disk $USER
Reboot when you're done.
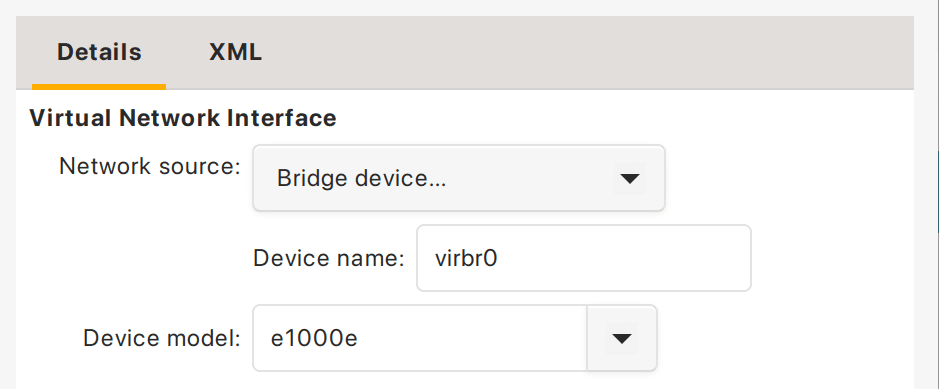
Find the Bridged Connection
You'll need to understand what the named bridged device is before you create the VM. We want our VM to have bridged networking as we'd want to be able to access it "remotely".
virshWhich will bring you to a virsh shell. Then just do this:
virsh # net-info --network defaultYou'll find some device that has virbr0 or something similar. That's your bridged device name. Here is an example:
virsh # net-info --network default
Name:           default
UUID:           3e0e30c5-24fd-402e-b8af-e817c90432e9
Active:         yes
Persistent:     yes
Autostart:      yes
Bridge:         virbr0
You can find more details in this web page here: https://apiraino.github.io/qemu-bridge-networking/
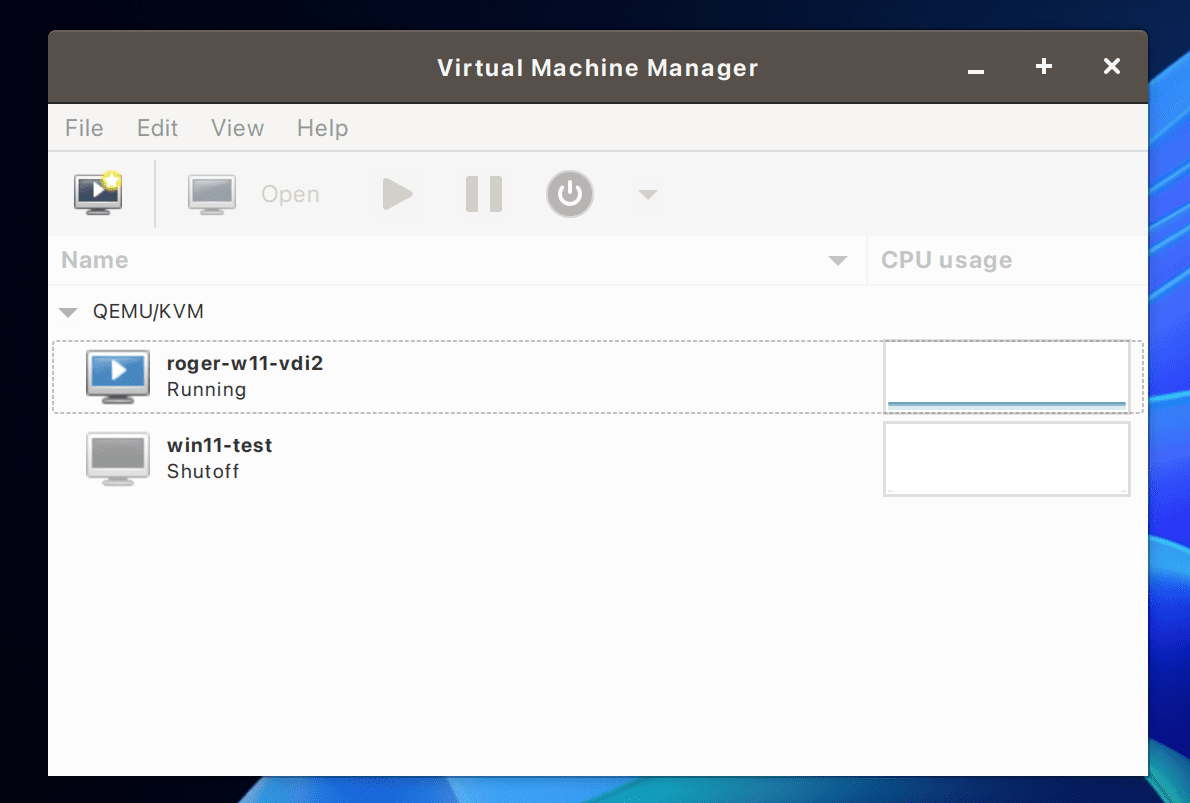
Provision a Windows VM
My workstation is very powerful. I have a 36c/72t Xeon w9 3475x and 256 GB of RAM. I have 2 GPUs, an Nvidia RTX A4000 and an Nvidia RTX 4090.
I will keep the A4000 as my main GPU used in Linux as I do not do any graphically intensive tasks on there, but will use my RTX 4090 for Windows gaming.
Since I have a lot of cores, I will actually provision an 8c/16t vCPU system with 64 GB of RAM for Windows 11. My use case here is to just do some basic Windows software development as necessary, and also all my gaming.
For networking, it is best to use Bridged Networking as you would want to be able to access the virtual machine remotely from your host computer using Remote Desktop or VNC as once the GPU is associated with the VM, you will no longer be able to see any visual output from the VM.
In summary my VM will have:
- 8c/16t vCPU
- 64 GB of RAM (no ballooning)
- 4TB Crucial NVMe SSD passed through (you can just provision a normal virtual disk too)
- Nvidia RTX 4090 GPU (passed through)
Note: I've passed-through an NVMe here, but you can just run a virtual disk instead.
Windows Installation
Install Windows 11 as you normally would. I recommend attempting to install this OS with quickest path possible. The goal is to install the OS as quickly as possible in a safe manner. GPU pass-through is tricky and anything can go wrong that can hose your VM. It's usually faster to just start over than to try and figure out what went wrong. Therefore any customization, tweaks, etc to this Windows 11 VM can wait until you have a good setup working with GPU pass-through.
After Windows is installed, you must immediately enable Remote Desktop, VNC or any other sort of remote access as once the GPU is associated with the Windows 11 VM guest, you will no longer be able to render anything on screen from the QEMU virt-manager.
You'll also need the following installed in your Windows 11 VM guest:
- VirtIO Drivers - You will download the ISO on your host computer and mount it to the guest VM to install the drivers. Here is some information about what VirtIO is: https://pve.proxmox.com/wiki/Windows_VirtIO_Drivers
- Spice Guest Tools - You will download this in the guest VM and install it within that environment. This will be required for Clipboard sharing between the Linux host and your Windows VM guest. If you don't plan on sharing the clipboard, then you don't need this.
Install the VirtIO drivers by mounting the ISO from your host to the VM. Then install the Spice guest tools in the VM.
GPU Pass-through
The easiest way to configure VFIO for GPU passthrough on your host computer is to use HikariKnight's quickpassthrough tool. You can find the repository here: https://github.com/HikariKnight/quickpassthrough.
If you're lazy like me, you can get the precompiled binary and run it: https://github.com/HikariKnight/quickpassthrough/releases.
Since it is a go binary, you can simply start the tool like this:
./quickpassthroughRun the tool, and follow the on-screen instructions. This tool basically adds the GPU to the blocklist and configures VFIO drivers.
Restart the host computer when the quickpassthrough tool has completed the steps.
After restarting the host computer, if you want to confirm that the GPU is now utilizing VFIO, you can run the command:
lspci -knIf you then inspect the output for your device, you will come across the Kernel driver in use: label. This should at least say something like vfio-pci like this:
52:00.0 0300: 10de:2684 (rev a1)
	Subsystem: 1043:889d
	Kernel driver in use: vfio-pci
	Kernel modules: nvidiafb, nouveau, nvidia_drm, nvidia
52:00.1 0403: 10de:22ba (rev a1)
	Subsystem: 1043:889d
	Kernel driver in use: vfio-pci
	Kernel modules: snd_hda_intel
Now, let's make the VM work with the GPU!
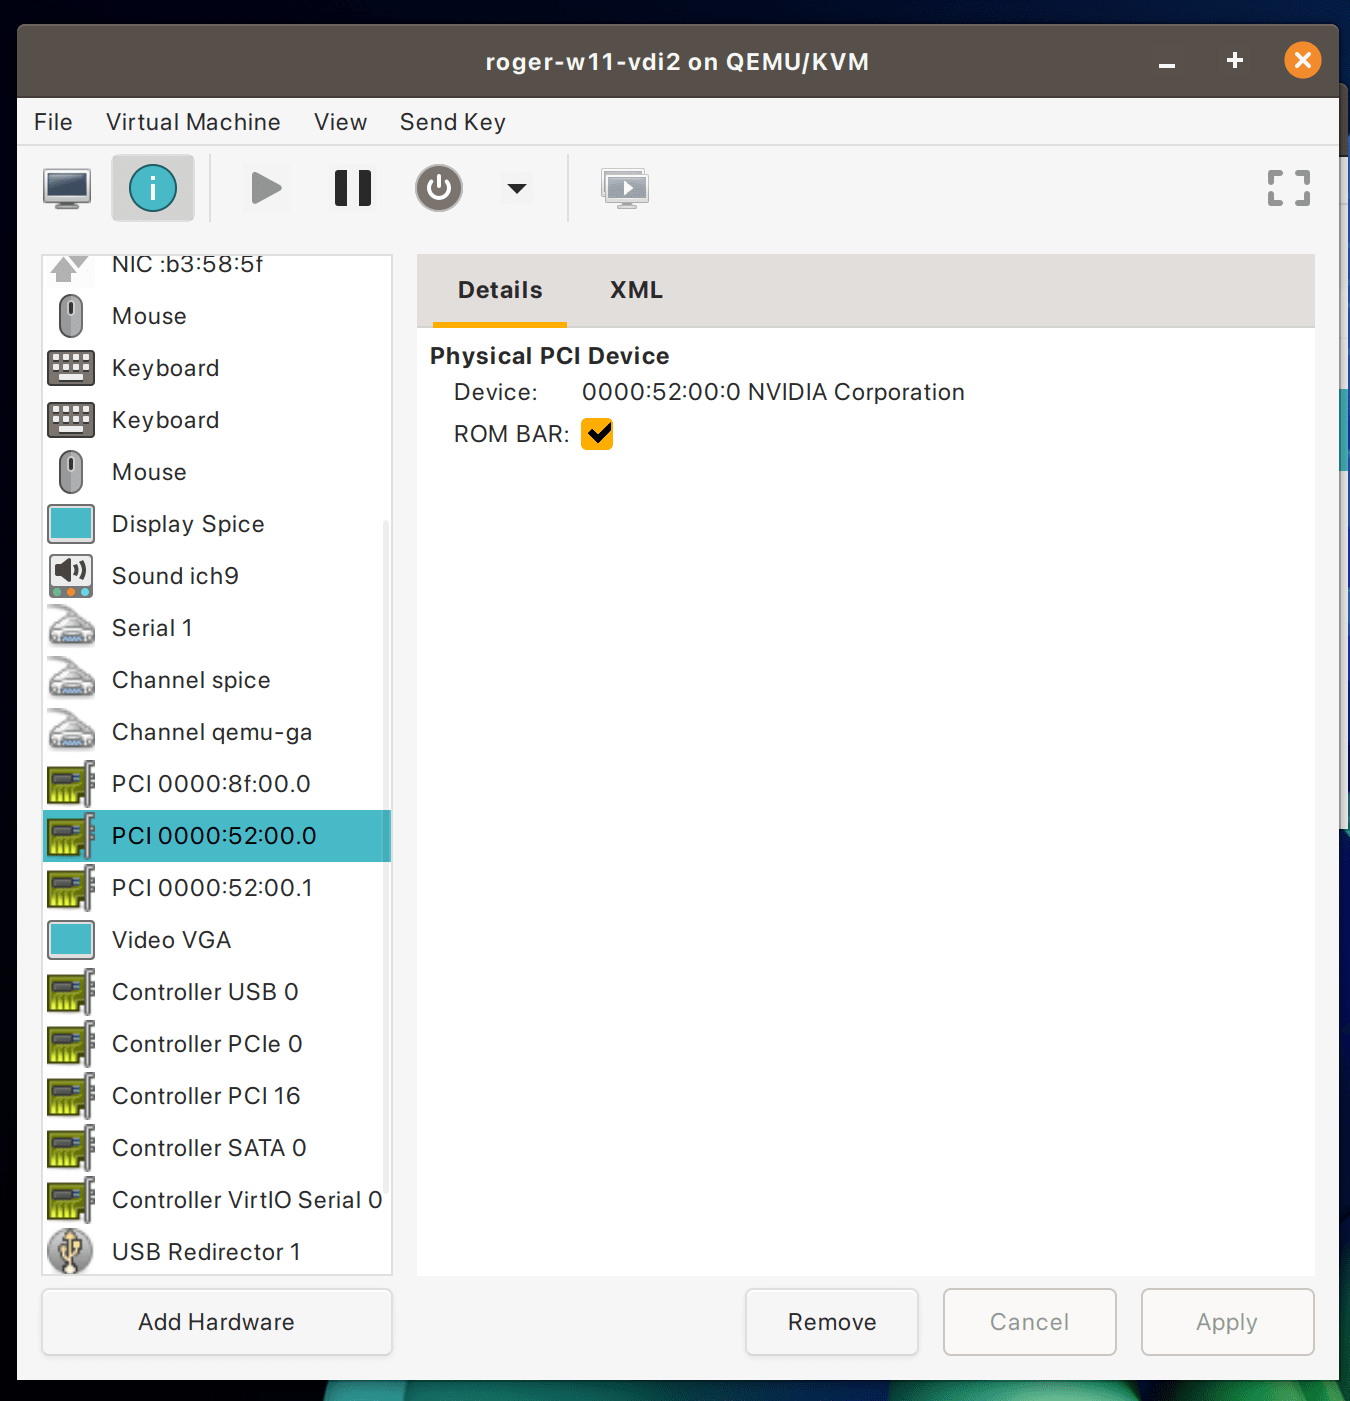
Going back to your VM, make sure you have Remote Desktop configured correctly. Once you add the GPU to the VM, you will no longer receive any video output from virt-manager -- so use remmina or your favorite remote desktop client to create a session.
With the VM off, add all associated devices in the IOMMU group related to the GPU you have just passed through to the VM. In my case, it is 52:00.0 for the GPU and 52:00.1 for the associated audio device to it.
Then take the HDMI or DisplayPort and physically plug it into the the GPU which is being utilized by the guest VM. This will simulate a monitor being plugged into the GPU
Start the VM guest, and wait for CPU activity to settle in virt-manager. Once settled, you can try to establish a remote desktop connection to it.
If you're successful in establishing a connection, congrats, you're almost there! Next is to check device manager to see if the GPU is being recognized.
The device manager may not immediately show the GPU at first, but after some time, you'll see the model come up. Download the appropriate drivers in the VM guest and install the drivers. Reboot the VM and ensure that you can still establish a remote desktop connection.
If we're not getting any video in virt-manager and a typical remote desktop connection isn't going appropriate for low-latency, and graphical use, then how do we actually take advantage of our awesome 3D-graphics capable VM?
We will need a piece of software called "Looking Glass".
Looking Glass
A good way to gain some context is through the Looking Glass website itself. https://looking-glass.io/
I recommend using the stable B6 version. As of 2024, it's already 2 years since the last stable release, but so far, for my use case, it has been very good. https://looking-glass.io/downloads
The hard part about this is that the client app must be built from source. If you're on a Debian-based system, you can use my pre-compiled B6 binary here: https://github.com/urbanspr1nter/pub-scripts/blob/main/bin/looking-glass-client/looking-glass-client
Otherwise, I would follow the instructions found in the Looking Glass docs. Don't miss any dependencies, and it should be a fairly easy process.
I'd install the Looking Glass Host service first on the Windows 11 machine, and work on the client later.
Make sure it is running as a service in Windows by going to services.msc, and then checking to see if the Looking Glass (host) is started and also enabled to auto-start at boot.
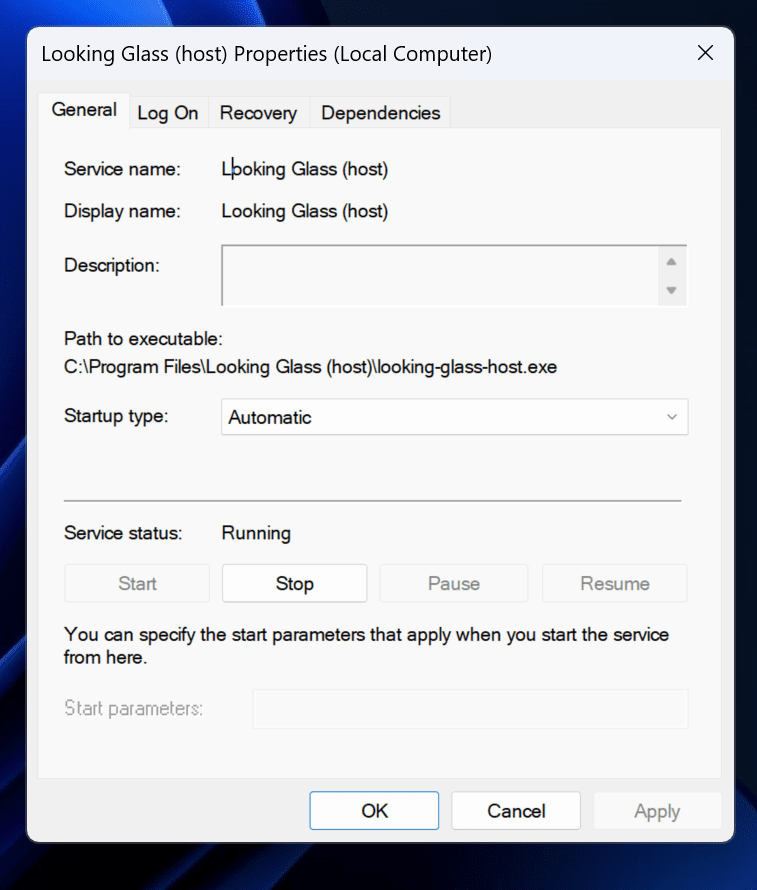
Now, by default, the Looking Glass host isn't going to start whenever you start your VM. This means that in this model, your client (Linux host) is only able to access the VM (Windows 11 guest) if the user in Windows 11 has signed-in.
This is pretty inconvenient as the whole point is to try and gain as much control performing operations remotely as possible with the least friction. Fortunately, you can force the Looking Glass host service to start whenever Windows 11 starts (at the sign-in screen). You'll need to check Allow service to interact with desktop in the Log On tab in addition to having it be a Local System account log on.
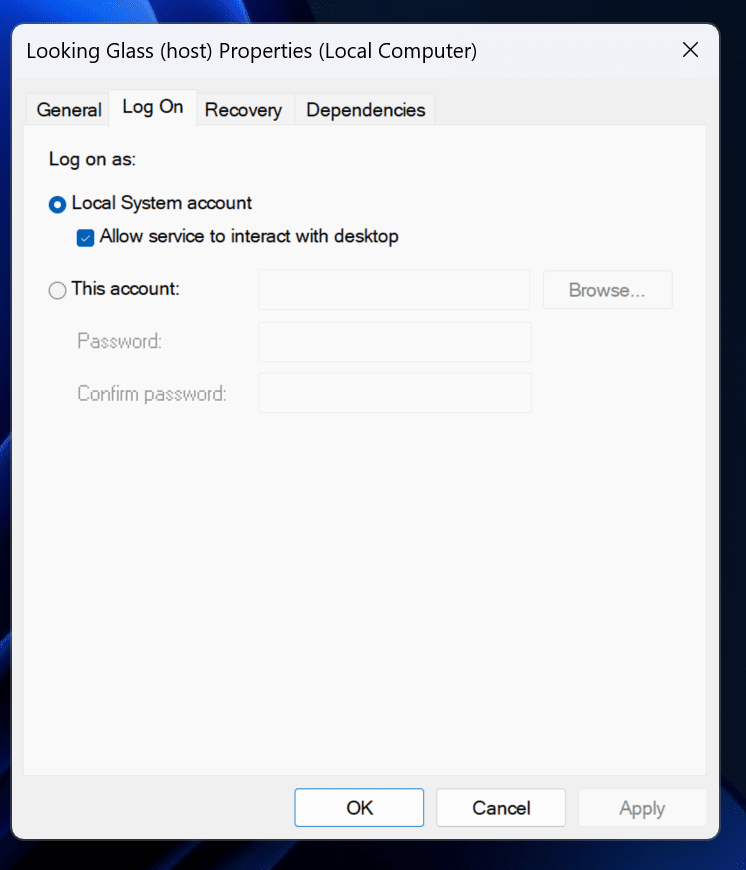
Restart the VM for good measure because... Windows.
Next, reconfigure your VM through the steps provided by the Looking Glass documentation to setup input devices as VirtIO, etc. Also make sure that your VM guest is now configured to have a Spice display, and a VGA video.
Building the Looking Glass client. To build the client, you can just follow the instructions here. My advice is to just follow the steps completely. There are a lot of dependencies you need to install, and attempting to selectively install dependencies can just lead you to fail generating the Cmake file.
Also, I'm not sure about Wayland. I did all of this in X11, and I do believe that Looking Glass works better under X11. That's something to consider.
If you're too lazy to do the build, feel free to just use my pre-compiled binary if you're on Debian. If you want to use the client from any other Linux distribution, macOS or Windows, then for sure the client will need to be rebuilt.
Next you can start Looking Glass like this:
./looking-glass-clientIt should begin an attempt to connect to the Windows 11 guest VM immediately! If you're like me and want to make it feel "real" you can start Looking Glass with additional parameters:
./looking-glass-client -m 109 -FWhat this actually does is re-map the escape key (default ScrlLock ) to be PageDown (109) (-m) and start the client in fullscreen mode -F.
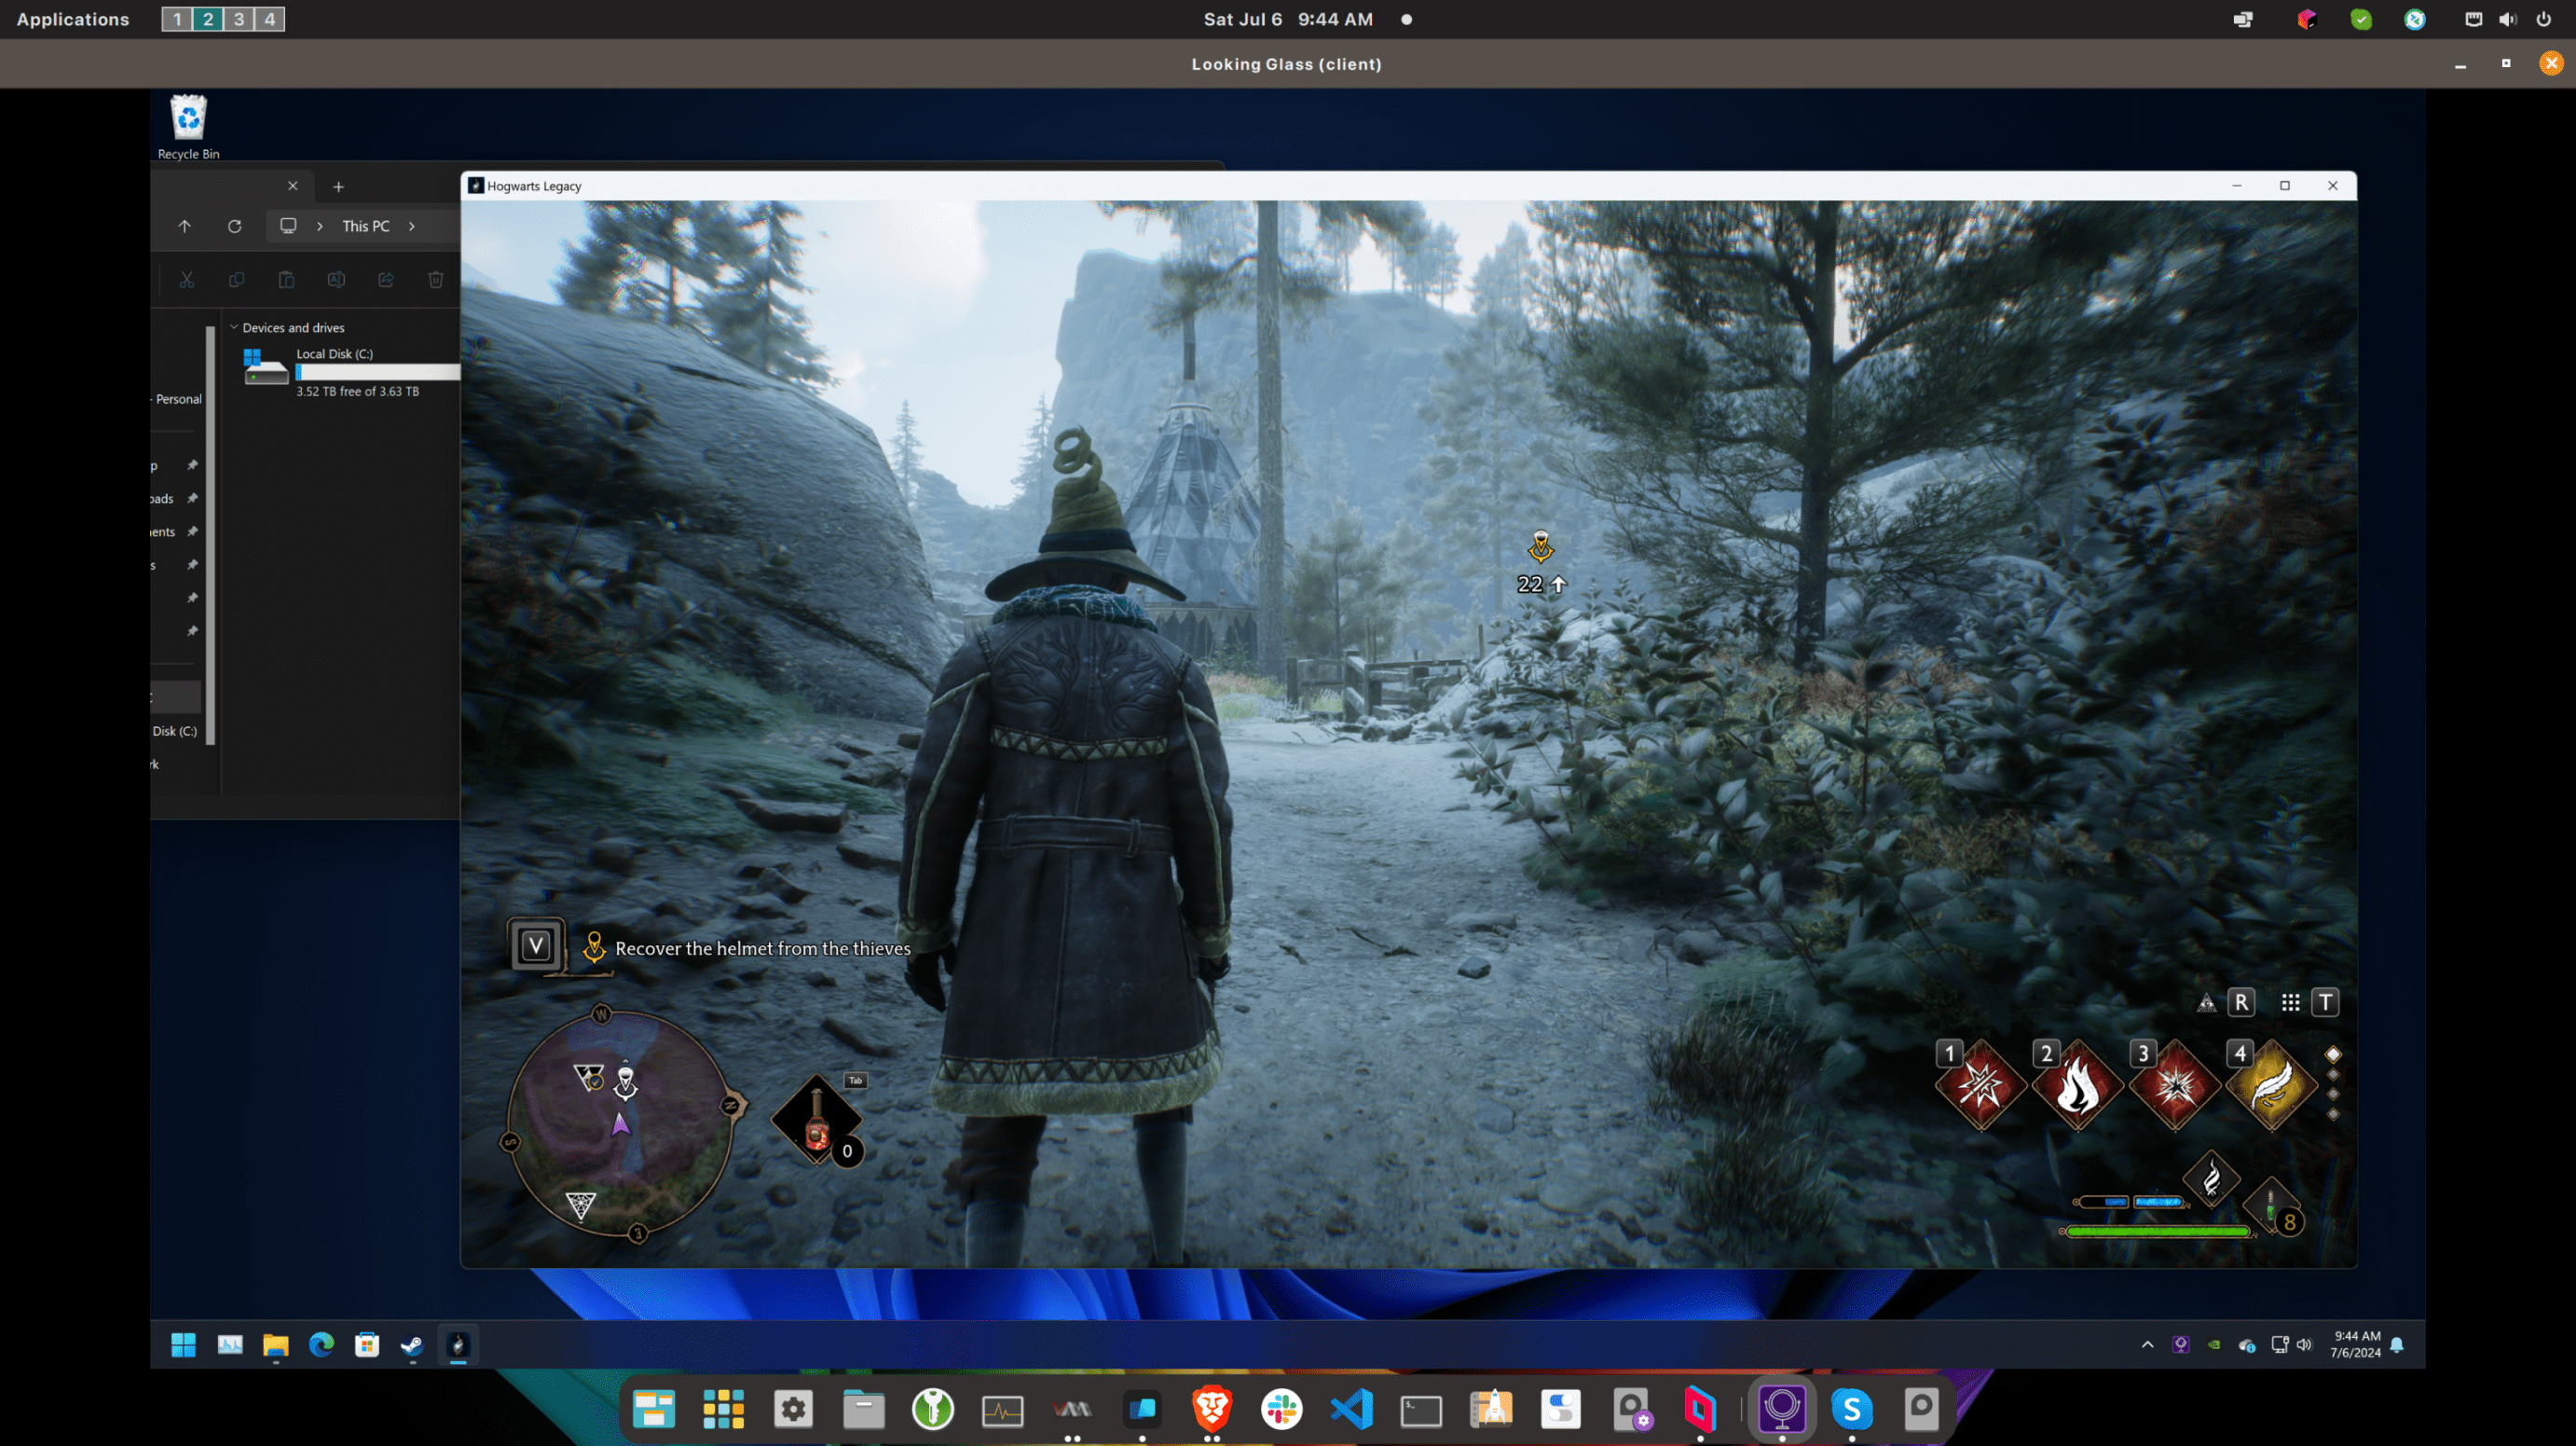
It all works!
Post-Install and Configuration
Hooray, if you've made it this far, then it's time for some of the customization and tweaks I told you to hold off on until we got GPU pass-through working.
Here are some ideas:
- Activate Windows 11 and install all necessary updates
- De-bloat Windows
- Install any tools you may want to analyze performance for your VM including:
- GPU benchmarking tool like UNiGEN
- CPU benchmarking tool like Cinebench
- GPU-Z
- Games!
- Any development tools you might need specifically for Windows such as Visual Studio, SQL Server Management Studio, etc
Have fun!
Troubleshooting (High-end GPUs)
Okay, all those instructions above work really well if your GPU isn't an Nvidia RTX 4090, or any other GPU to massive amounts of VRAM.
I will admit now that I had issues actually getting my 4090 to work with my VM. The initial setup with quickpassthrough with VFIO was smooth and well, but actually getting the VM to output anything was struggle.
I didn't look too much into the real reason why, but the gist of my understanding is due to lack of addressing space for the VM to map VRAM for the GPU and Resizable Bar being enabled. For the memory thing, it kind of makes sense to me, but for ReBar, I have no clue why I need to disable it in the UEFI BIOS, but it worked.
There's some additional configuration necessary to get the VM to start recognizing the GPU correctly. You'll need to modify the VM's XML configuration directly in virt-manager.
First, change the opening <domain> element to look like this:
<domain type='kvm' xmlns:qemu='http://libvirt.org/schemas/domain/qemu/1.0'>Then add this new element after </devices>:
<qemu:commandline>
  <qemu:arg value='-fw_cfg'/>
  <qemu:arg value='opt/ovmf/X-PciMmio64Mb,string=65536'/>
</qemu:commandline>
Then reboot into the UEFI BIOS of your host computer, make sure ReBar is turned off.
Your VM should at least recognize the GPU now. You will have to install drivers through the remote desktop session.